


Table of Contents
ToggleAyaka has cemented herself as one of Genshin Impact’s most dominant DPS characters since her release in version 2.0, and she’s only gotten stronger with smart team building and artifact optimization. Whether you’re pushing Floor 12 of the Abyss or farming overworld domains, understanding how to maximize Ayaka’s cryo damage output separates casual players from those consistently clearing endgame content. This guide breaks down everything you need to know about building and playing Genshin Impact’s Cryo DPS queen, from weapon selection and artifact priorities to advanced team synergies and combat rotations. We’ll cover the exact stats, constellations worth investing in, and Floor 12 strategies that leverage her kit to its fullest potential.
Key Takeaways
- Genshin Impact Ayaka remains a top-tier cryo DPS carry best suited for freeze and melt team compositions that maximize her burst damage and charged attack scaling.
- Mistsplitter Reforged is Ayaka’s best-in-slot weapon, while free-to-play players can achieve viability with Amenoma Kageuchi (R5) crafted from the Inazuma blacksmith.
- Blizzard Strayer (4-piece) is essential for freeze teams as it grants up to 40% crit bonus against frozen enemies, allowing you to prioritize crit damage over crit rate on artifacts.
- Optimal team compositions pair Ayaka with off-field hydro and cryo applicators like Kokomi + Kazuha + Fischl for freeze, or Bennett + Kazuha + Fischl for melt single-target damage.
- Prioritize leveling Ayaka’s Normal Attack and Burst talents first, aim for 2000+ attack, 50%+ crit rate, 150%+ crit damage, and 200% cryo damage bonus for endgame Spiral Abyss clears.
- C0 Ayaka is fully viable for all content; skip constellations unless whaling, as C4 and higher are luxury investments that don’t fundamentally change her effectiveness.
Who Is Ayaka and Why She Matters
Role and Playstyle
Ayaka functions as a cryo-infused elemental DPS carry with an emphasis on burst windows and normal attack scaling. Her playstyle revolves around channeling her Kamisato Art: Kabuki charged attack, which moves her forward and leaves cryo trails, followed by her ultimate Kamisato Art: Soumetsu, a long-duration field that deals massive cryo damage to everything standing in it.
Her passive ability Cryo Affinity boosts her cryo damage after performing a charged attack, and her ascension stat is cryo damage bonus, meaning she naturally scales toward high cryo output. Unlike some other carries, Ayaka doesn’t have sustained single-target damage: instead, she excels in burst phases where her charged attacks and ultimate field handle multiple enemies at once.
This makes her ideal for freeze compositions where enemies are held in place by hydro + cryo application. She’s also flexible enough to work in melt teams where pyro enablers amplify her damage through reaction multipliers. Her cryo application is fast enough that she can be the primary cryo applicator on a team, but she works even better when paired with another cryo or hydro character to ensure consistent elemental reactions.
Optimal Weapon Choices
Best-in-Slot Weapons
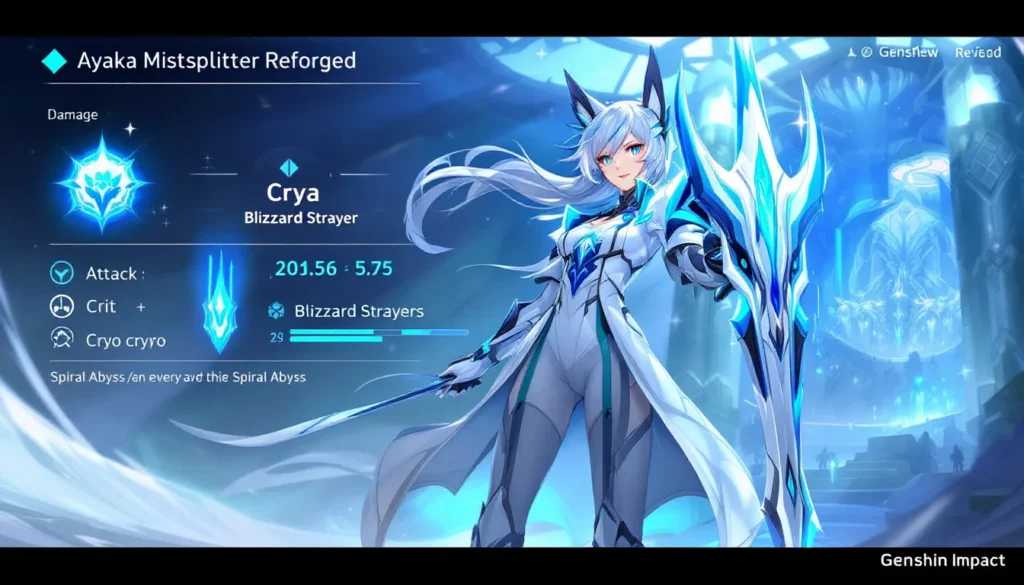
Mistsplitter Reforged remains Ayaka’s best weapon overall. The 12% cryo damage bonus from its passive stacks with her ascension bonus and artifact stats, and the normal attack buff scales directly into her charged and normal attacks. At R1, it’s a ~10% damage increase over other 5-star options: at higher refinements, the gap widens further.
Aqua Simulacra is a close second if you’re running freeze teams with consistent cryo teammates. The elemental damage bonus is slightly more accessible than Mistsplitter’s attack scaling, and the passive heal provides breathing room in dangerous Abyss chambers.
Primordial Jade Cutter offers attack scaling and a flat HP boost, but it doesn’t synergize as directly with Ayaka’s kit as the cryo-focused options. Use it only if Mistsplitter is unavailable and you want pure damage output.
Free-to-Play Alternatives
F2P players aren’t locked out of Ayaka viability. Amenoma Kageuchi, a 4-star weapon craftable through the Inazuma blacksmith, provides energy recharge and mimics Mistsplitter’s cryo damage via its passive. At R5, it’s a legitimate option that lets you prioritize other stats on your artifacts.
Hakushin Ring (if you have it) also works in freeze teams where off-field cryo support is available. Its elemental damage bonus applies to all team members, making it valuable beyond just Ayaka.
Rancour is a solid placeholder while you farm better options. The attack scaling keeps your damage floor respectable, and it doesn’t require gacha luck to obtain. Avoid pure ER weapons like Favonius, Ayaka doesn’t need that much energy generation if your team rotations are sound, and the wasted stats hurt your damage ceiling.
Artifact Sets and Stat Priorities
Recommended Artifact Combinations
Blizzard Strayer (4-piece) is the standard choice for freeze teams. The 15% cryo damage bonus from 2-piece is solid, but the 4-piece passive, which grants 20% crit rate against frozen enemies and an additional 20% crit damage, is game-breaking. This is why freeze Ayaka can run critical damage circlets instead of crit rate ones.
Shimenawa’s Reminiscence (4-piece) is viable in melt teams or when you’re running Ayaka without a dedicated freeze applicator. The attack% bonus from using charged attacks pairs well with her playstyle, though you lose the cryo damage% from Blizzard’s 2-piece.
Hybrid builds sometimes mix 2-piece Blizzard Strayer with 2-piece Shimenawa’s or Gladiator’s Finale. This trades some freeze-specific value for more balanced scaling, useful if you’re still farming and don’t have perfect Blizzard pieces.
Key Stats and Substats
Prioritize Crit Damage as your primary stat. In Blizzard Strayer freeze teams, Ayaka can reach 80+ crit rate from passives, set bonuses, and teammates, so cryo damage artifacts with crit damage circlets become your limiting factor.
Crit Rate matters as a secondary concern. You need roughly 15-25% from substats in freeze, more like 50%+ if you’re running melt or hybrid builds where Blizzard’s 4-piece doesn’t apply.
Attack Percentage is your go-to main stat for sands. Flat attack is weaker relative to the percentages available from artifacts and weapons.
Cryo Damage Bonus goblets are nearly always better than attack%, especially if you have Mistsplitter. Even if you don’t, the scaling math favors elemental damage for dedicated DPS characters.
Energy Recharge as a substat depends on your team. With Fischl or Rosaria providing off-field cryo, you can run lower ER (140-150%). Without that support, push toward 160-170%.
Target builds look like this: 2000+ attack, 50%+ crit rate (25%+ in pure freeze), 150%+ crit damage, 200% cryo damage bonus from substats and set bonuses.
Team Compositions and Synergies
Freeze Team Strategies
Freeze compositions leverage Ayaka’s fast cryo application with off-field hydro applicators to permafreeze enemy groups. The frozen status extension allows Blizzard Strayer’s crit bonuses to apply consistently, maximizing Ayaka’s damage ceiling.
Ayaka + Kokomi + Kazuha + Cryo Support: Kokomi provides hydro off-field application and healing, reducing your need for a dedicated healer. Kazuha buffs cryo damage and provides elemental damage bonuses. The fourth slot is flexible, Rosaria adds crit rate and off-field cryo, while Fischl provides off-field cryo (though she doesn’t hydro-apply, limiting freeze uptime).
Ayaka + Yelan + Kazuha + Rosaria: For players without Kokomi, Yelan offers off-field hydro application with built-in damage amplification. This is slightly more damage-focused and less defensive than the Kokomi variant. Rosaria’s crit-sharing passive becomes more valuable when you’re not already at the crit rate cap.
Ayaka + Barbara + Kazuha + Fischl: Budget-friendly variant using Barbara’s off-field hydro. She heals but doesn’t apply hydro as consistently as Kokomi or Yelan. Fischl adds off-field cryo burst damage. This works fine for overworld and lower Abyss floors, but struggles in harder endgame content.
Freeze teams excel against enemies that can be frozen and benefit from Ayaka’s wide AoE. They struggle against freeze-immune enemies (like Perpetual Mechanical Array) or scattered targets where grouped positioning matters.
Melt and Vaporize Alternatives
Melt teams pair Ayaka with pyro applicators like Bennett or Xiangling. Melt multiplies her cryo damage by 1.5x when pyro is applied before cryo hits, turning each charged attack into a nuke. But, melt requires careful rotation management since you need pyro on enemies without overloading or causing unwanted reactions.
Ayaka + Bennett + Kazuha + Fischl: Bennett buffs attack and applies pyro. Kazuha amplifies both pyro and cryo damage. Fischl adds off-field damage. This is a solid single-target melt setup but loses AoE compared to freeze.
Vaporize Ayaka is niche and usually not worth building. While hydro can trigger vaporize (1.5x multiplier), Ayaka’s cryo application is too strong for hydro teammates to reliably apply it before she cryo-applies, limiting vaporize uptime.
Melt setups demand higher damage-per-hit rotations but feel less forgiving if you mess up. Freeze is more forgiving but can’t handle freeze-immune chambers. Choose based on what your Abyss lineup looks like.
Talent Leveling and Ascension Path
Max Normal Attack and Burst talents first. Ayaka’s damage comes primarily from her charged attacks and ultimate, so these two talents scale her output most directly. Getting them to Level 10 (with crowning at least one) is the priority investment.
Elemental Skill (her dash) is lower priority. It applies cryo and generates energy, but its base damage is low compared to her other tools. Level 6-8 is sufficient unless you’re running a rotation where you spam it.
Ascension-wise, Ayaka’s ascension material is the Ominous Bloom from the Hydro Hypostasis in Inazuma. You’ll need Shards of Fused Glass from weekly Bosses and Perpetual Kalpa from the Maguu Kenki. Plan your farm routes accordingly since Hydro Hypostasis is a daily domain.
Prioritize leveling her to Level 80/90 before crowning talents, the ATK scaling from ascension directly boosts her burst damage. Unlike some characters, Ayaka benefits from the extra ascension levels since her kit has no EM scaling or level-dependent multipliers that cap out early.
If you’re F2P or resource-constrained, Level 80/90 with Talents 8/8/8 is the bare minimum for comfortable Abyss clears. Level 90/90 with Level 10 talents is the whale-friendly ceiling.
Constellation Breakdown and Value
C0 Ayaka is completely viable for all content. Don’t feel pressured to pull for constellations, her base kit is strong enough to clear Spiral Abyss at the highest difficulty.
C1 reduces her elemental skill cooldown from 10 to 8 seconds and grants an extra charge. This makes her energy generation slightly more flexible, but it’s not a game-changer. Nice-to-have, not essential.
C2 increases her burst damage by 30% when all nearby enemies are frozen. This is situational, it only procs in freeze teams against grouped enemies. Strong in some chambers, useless in others.
C4 extends her burst duration by 2 seconds, effectively giving you 8 seconds instead of 6. Since her ultimate is the primary damage tool, this is a meaningful DPS increase (~15-20%). This is the first “strong” constellation for dedicated freeze players.
C6 is the whale constellation, after using her burst, her next charged attack is guaranteed to freeze enemies regardless of whether hydro is applied. This opens up melt and vaporize teams without needing hydro applicators, but it costs a fortune and is purely luxury.
If you’re spending: stop at C0. If you’re whaling: C4 or C6 significantly increase her damage ceiling. C2 is a skip unless you specifically want a tiny burst damage boost for freeze teams.
Combat Tips and Advanced Techniques
Charged attack management is crucial. Ayaka’s playstyle is about using charged attacks to move and apply cryo, then burst when enemies cluster. Don’t spam charged attacks endlessly, weave them between your support rotations to maintain energy generation without wasting time.
Jump canceling is a subtle optimization. After a charged attack, jump immediately to cancel the ending lag and start your next action faster. This shaves milliseconds off your rotation but makes a difference in tight DPS checks.
Grouping enemies with kazuha, Venti, or other controllers maximizes Ayaka’s AoE. Her burst hits everyone in its field, so concentrated targets = higher overall damage per rotation.
Energy management: Track your energy bar during rotations. If you’re about to burst and your supports are off-cooldown, you might delay your burst slightly to ensure they can regen energy from your cryo application. Conversely, if you’re full energy before your support’s cooldown is ready, go ahead and burst early, don’t waste potential energy generation.
Positioning: Stand at medium range during her burst. Too close and you might miss some ticks: too far and enemies walk out of the field. Practice positioning before tackling harder Abyss floors.
Facing freeze-immune content: Switch to melt or hybrid builds. Ayaka’s raw damage is still high enough to solo-carry without freeze mechanics. Bennett + Kazuha melt setups are your best bet if you have the right supports. External resources like Twinfinite game guides can provide additional rotation breakdowns for specific chambers if you’re stuck.
Stamina usage: Charged attacks consume stamina. If you’re fighting enemies with heavy knockback or need to dodge frequently, manage your stamina carefully. Don’t chain three charged attacks back-to-back unless you’re confident the fight allows it.
Floor 12 Abyss Strategies Using Ayaka
Spiral Abyss Floor 12 rotates chambers and enemy lineups every cycle, but Ayaka remains one of the most consistent carries. Here’s how to adapt her to recent 12-chamber layouts.
Chamber 1 (Mechs/Herralds): If the lineup includes freeze-immune enemies like Mechanical Humanoids or Heraldry Mages, melt Ayaka with Bennett is superior to freeze. These enemies also spread out, reducing freeze team effectiveness. Aim for 200%+ crit damage with 50%+ crit rate in melt builds. Avoid bringing pure freeze into this chamber, you’ll waste rotations managing frozen status that doesn’t matter.
Chamber 2 (Mixed/Grouped): If enemies can be frozen and group naturally (Frozen Cryo Cicins, Water Specters), freeze Ayaka stomps this chamber. Kokomi + Kazuha + Fischl or Rosaria works seamlessly. You’ll likely clear in 1-2 bursts per side. Most chambers favor freeze Ayaka’s wide AoE since designers expect players to use grouping-based teams.
Chamber 3 (Single Target/Boss): Against bosses like Azhdaha or Perpetual Mechanical Array, single-target melt Ayaka with Bennett shines. Freeze falls apart against mobile single targets that don’t stay grouped. Build crit-heavy melt Ayaka (65%+ crit rate minimum) and focus on burst damage. Boss chambers often award most stars based on DPS checks, so melt’s higher damage-per-hit becomes valuable.
Rotation optimization for Abyss: Time your support cooldowns to align with your burst. If Fischl’s off-field cryo duration ends just as your Ayaka burst starts, you’re not amplifying your damage. Pre-burst energy management matters too, cast your supports first to generate energy, then burst. Ping-pong between supports and Ayaka to ensure everyone benefits from buffs.
9-star strategy: Three stars require clearing both sides with time to spare. Bring your most comfortable DPS with the best artifacts on side 1, a weaker but functional DPS on side 2. Some players double down on Ayaka teams (one melt, one freeze) to leverage their investment. Others split Ayaka to one side and build a second carry for flexibility. Data from Game8’s Genshin tier lists shows Ayaka in both strategies consistently clears, so trust your artifact quality more than team variety.
Enemy-specific tips: Against fast enemies (Floating Hydro Anemones), position carefully since they kite away from your burst field. Against tanky enemies (Reapers), melt wins on time. Against grouped enemies, freeze dominates. Study the current Abyss lineup before 12-0 attempts so you can swap artifacts or supports if needed.
Conclusion
Ayaka remains one of Genshin Impact’s most consistent and rewarding DPS characters to build and play in 2026. Her flexibility across freeze and melt teams, combined with her high scaling and elegant playstyle, makes her relevant regardless of meta shifts. The difference between a casually-built Ayaka and an optimized one is dramatic, proper artifacts, team synergies, and rotation discipline can double your damage output.
Start with Blizzard Strayer + Kokomi freeze if you’re building her for the first time. It’s forgiving, straightforward, and does bonkers damage against grouped enemies. Once you’re comfortable with her rhythm, experiment with melt teams or hybrid builds for specific Abyss chambers. Invest in her talents early and don’t sleep on Mistsplitter if it ever appears on a weapon banner, the cryo damage scaling is too good to pass up.
Given recent Pocket Tactics guides on Genshin characters, Ayaka consistently ranks as top-tier DPS, and that assessment holds true. With consistent investment and smart team building, she’ll carry you through endgame content and remain viable through future game updates. Good luck in the Abyss, and may your crit rolls be ever in your favor.